Wintempla |
| Wintempla is a set of classes to simplify Microsoft Windows API (Win32). These classes are stored in four files: Wintempla.h, Wintempla.cpp, WintemplaWin.h and WintemplaWin.cpp.These four files are required for Desktop applications, however, only the two first two files are required for Web applications. You can add these files to any C++ project to use Wintempla classes. Wintempla es un conjunto de clases para simplicar la API de Microsoft Windows (Win32). Estas clases están almacenadas en cuatro archivos: Wintempla.h, Wintempla.cpp, WintemplaWin.h y WintemplaWin.cpp. Estos cuatro archivos son requeridos para aplicaciones de Escritorio, sin embargo, solamente los dos primeros archivos son requeridos para aplicaciones Web. Usted puede agregar estos archivos a cualquier proyecto de C++ para usar las clases de Wintempla. |
| Problem 1 |
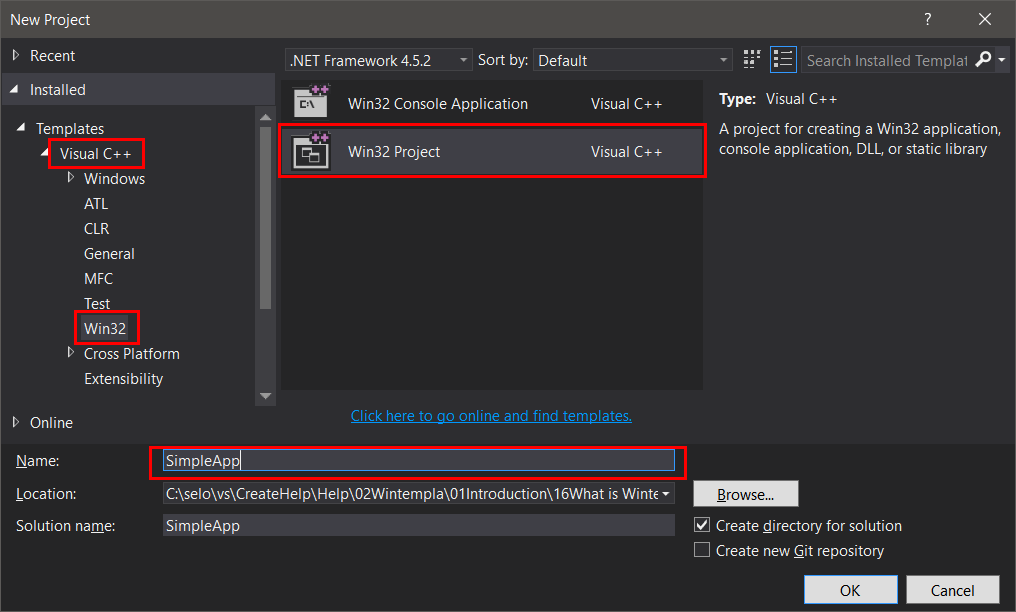
| Create a Win32 C++ application called SimpleApp using Microsoft Visual Studio. Follow the steps of the Wizard and click Finish to create the project. Cree una aplicación de Win32 C++ llamada SimpleApp usando Microsoft Visual Studio. Siga los pasos del asistente y haga clic en Finalizar para crear el proyecto. |
| Step A |
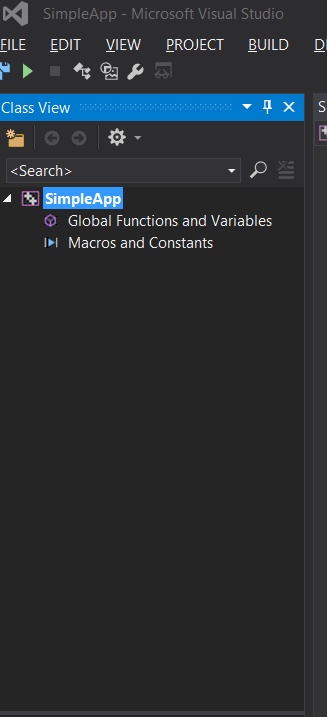
| Open Class View to inspect the classes in the project. Observe that there are not classes in the view. Abra la Vista de Clases para inspeccionar las clases en el proyecto. Observe que no hay clases en la vista. |
| Step B |
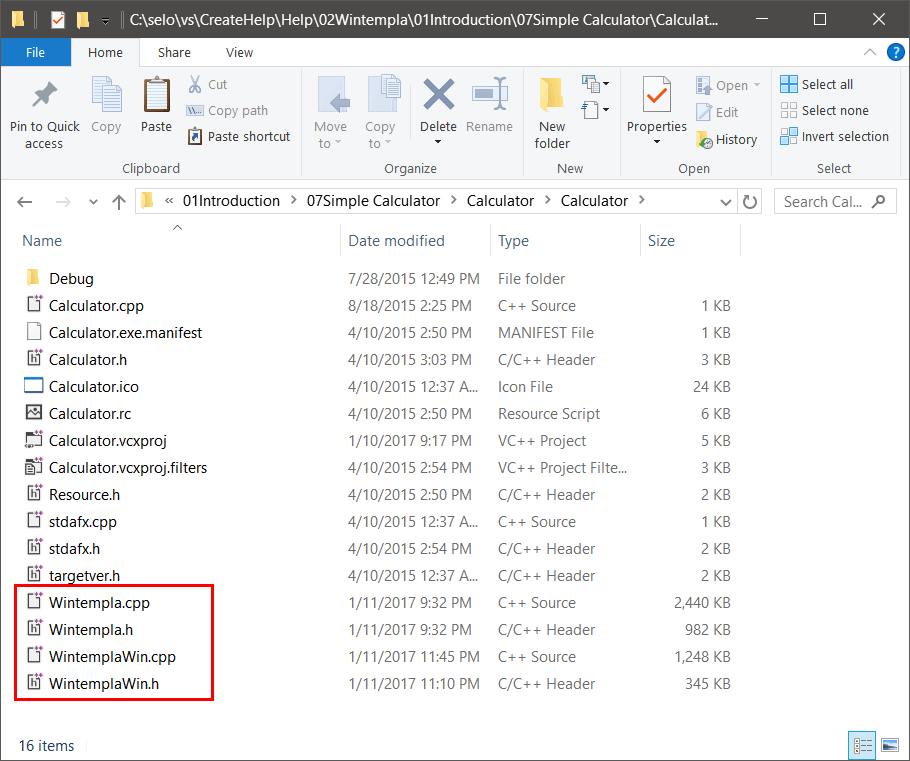
| Using Windows Explorer open the project folder of any Wintempla project and look for the files: Wintempla.h, Wintempla.cpp, WintemplaWin.h and WintemplaWin.cpp. Usando el Explorador de Windows abra la carpeta de proyecto de cualquier proyecto de Wintempla y busque los archivos: Wintempla.h, Wintempla.cpp, WintemplaWin.h y WintemplaWin.cpp. |
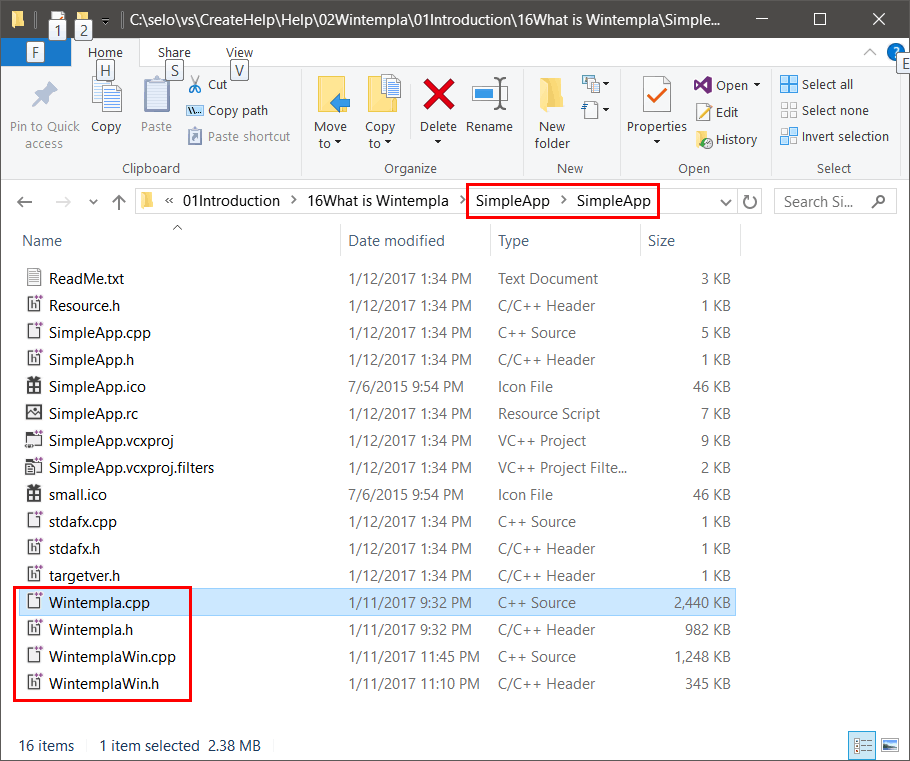
| Step C |
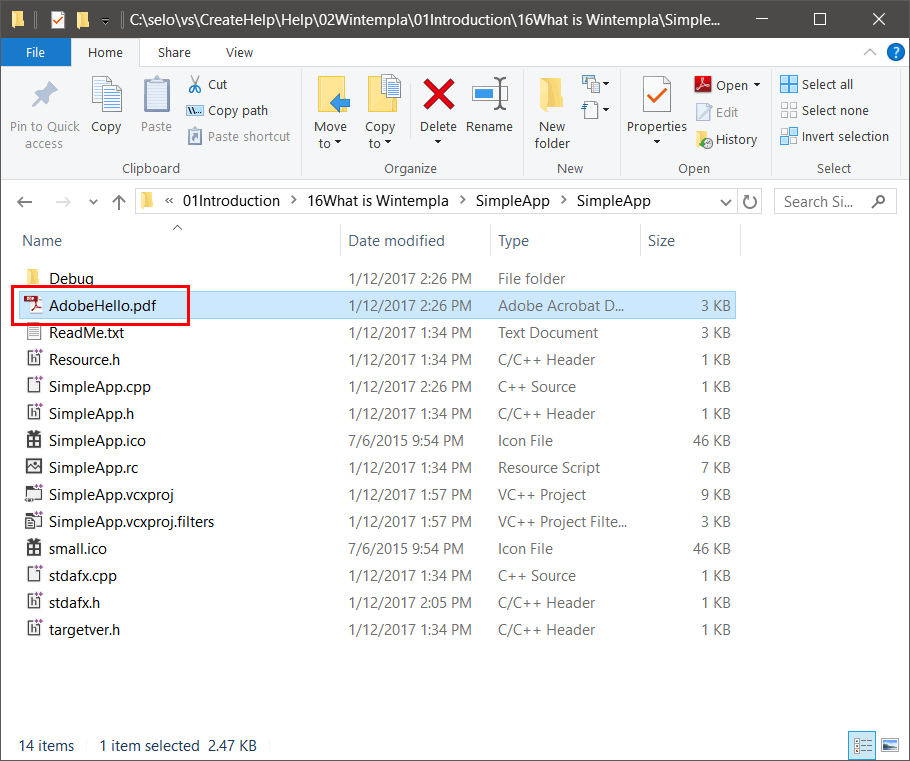
| Copy these files to the SimpleApp project folder as shown. Copie estos archivos a la carpeta del proyecto SimpleApp como se muestra. |
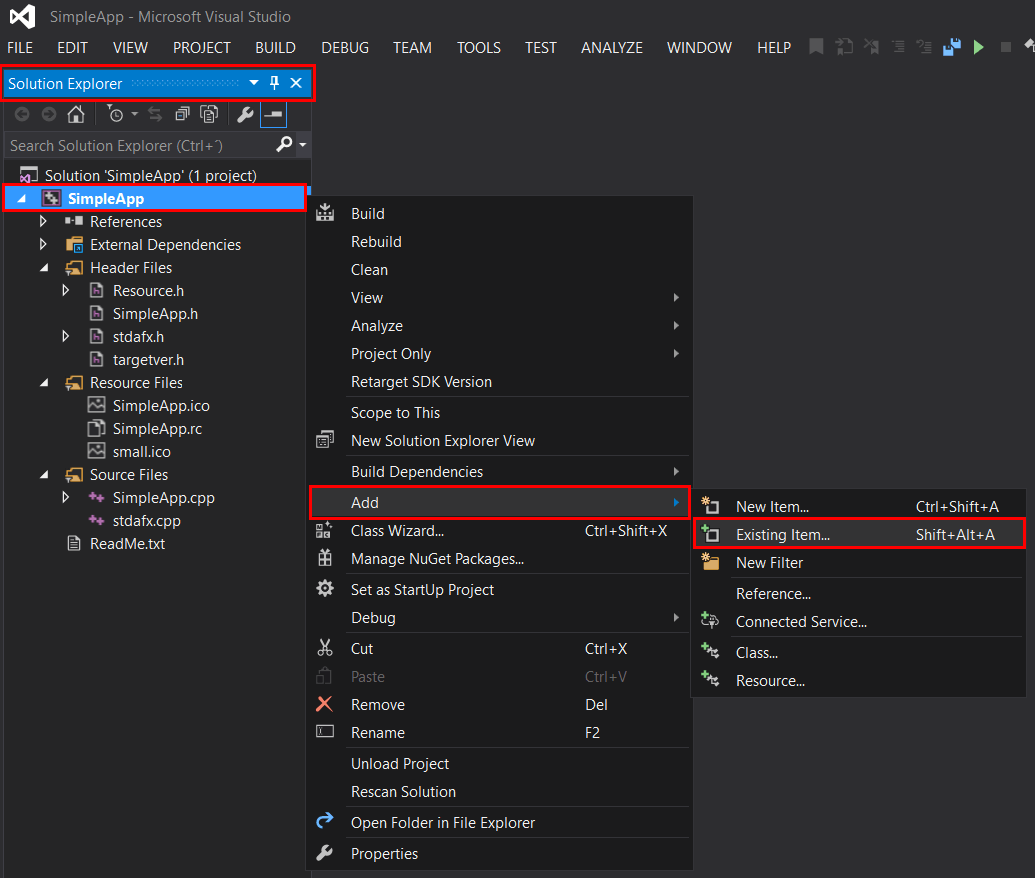
| Step D |
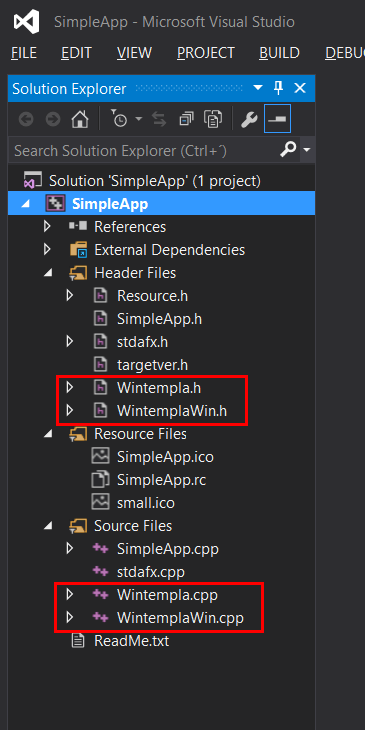
| Open Solution Explorer in Microsoft Visual Studio, select SimpleApp, and right click to open the context menu. Select Add > Existing Item... as shown to add the files: Wintempla.h, Wintempla.cpp, WintemplaWin.h and WintemplaWin.cpp that are in the SimpleApp project folder. Observe that you can add files that are located in other folders using this procedure. Abra el Solution Explorer en Microsoft Visual Studio, seleccione SimpleApp y haga clic con el botón derecho del ratón para abrir el menú de contexto. Seleccione Add > Existing Item... como se muestra para agregar los archivos: Wintempla.h, Wintempla.cpp, WintemplaWin.h y WintemplaWin.cpp que están en la carpeta del proyecto SimpleAdd. Observe que usted puede agregar archivos que están ubicados en otras carpetas usando este método. |
| Step E |
| Edit the stdafx.h file as shown. Observe that if you add files that are not located in the project folder, you must provide an appropriate path so that Microsoft Visual Studio can locate this files (relative paths are preferred to absolute paths.) Edite el archivo stdafx.h como se muestra. Observe que si usted agrega archivos que no están ubicados en la carpeta del proyecto, usted debe proporcionar una ruta apropiada para que Microsoft Visual Studio puede localizar estos archivos (rutas relativas son preferidas a las rutas absolutas). |
| stdafx.h |
| // stdafx.h : include file for standard system include files, // or project specific include files that are used frequently, but // are changed infrequently // #pragma once #include "targetver.h" #define WIN_GDI_PLUS_ON #include "Wintempla.h" #include "WintemplaWin.h" //#include "..\..\Win\Wintempla.h" //#include "..\..\Win\WintemplaWin.h" using namespace std; |
| Step F |
| Edit the SimpleApp.cpp file as shown. Edite el archivo SimpleApp.cpp como se muestra. |
| SimpleApp.cpp |
| // SimpleApp.cpp : Defines the entry point for the application. // #include "stdafx.h" #include "SimpleApp.h" int APIENTRY wWinMain(_In_ HINSTANCE hInstance, _In_opt_ HINSTANCE hPrevInstance, _In_ LPWSTR lpCmdLine, _In_ int nCmdShow) { HWND hWnd = ::GetDesktopWindow(); Pdf::Document doc; doc.page.resize(1); doc.AddFont(hWnd, PDF_FONT_ARIAL); doc.page[0].Concat(1.0, 0.0, 0.0, 1.0, 0.0, 0.0); doc.page[0].FillColor(RGB(255, 0, 255)); doc.page[0].BeginText(); doc.page[0].MoveText(60.0, doc.page[0].GetHeight() - 60.0); doc.page[0].Font(PDF_FONT_ARIAL, 24.0); doc.page[0].ShowText(L"Hello PDF World"); doc.page[0].EndText(); // if (doc.Save(L"AdobeHello.pdf")) { ::MessageBox(hWnd, L"PDF successfully created", L"Wintempla AdobeHello", MB_OK | MB_ICONERROR); } else { ::MessageBox(hWnd, L"Error creating PDF", L"Wintempla AdobeHello", MB_OK | MB_ICONERROR); } return 0; } |
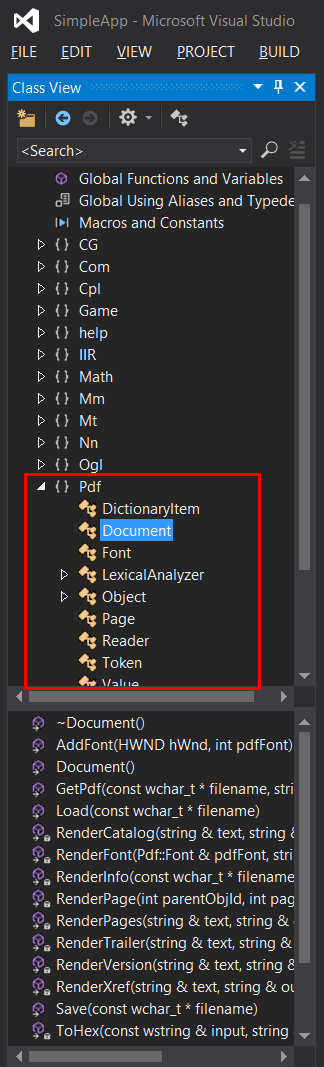
| Step G |
| Open Class View to see Wintempla classes. Abra la Vista de Classes para ver las clases de Wintempla. |
| Step H |
| Run the program, the program will create a PDF file using Wintempla classes. Ejecute el programa, el programa creará un archivo PDF usando las clases de Wintempla. |